Twin Stars – A Jelly Roll Quilt
Workshop Information
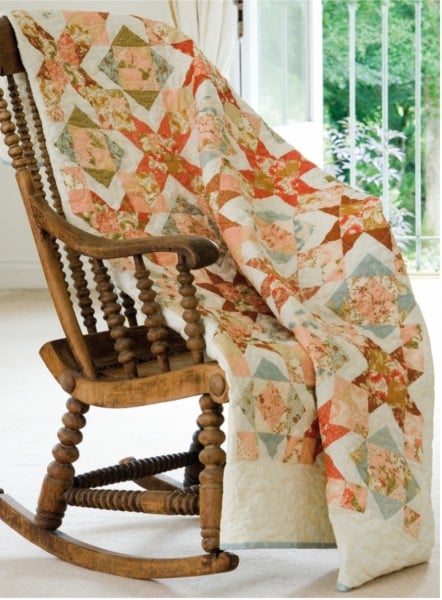
Come and make this stunning jelly roll quilt. Learn how to cut half-square triangles from your jelly roll strips using the Creative Grids 45/90 plus flying geese units and four-patch units. We learn how to make two star blocks which combine to make this gorgeous quilt.
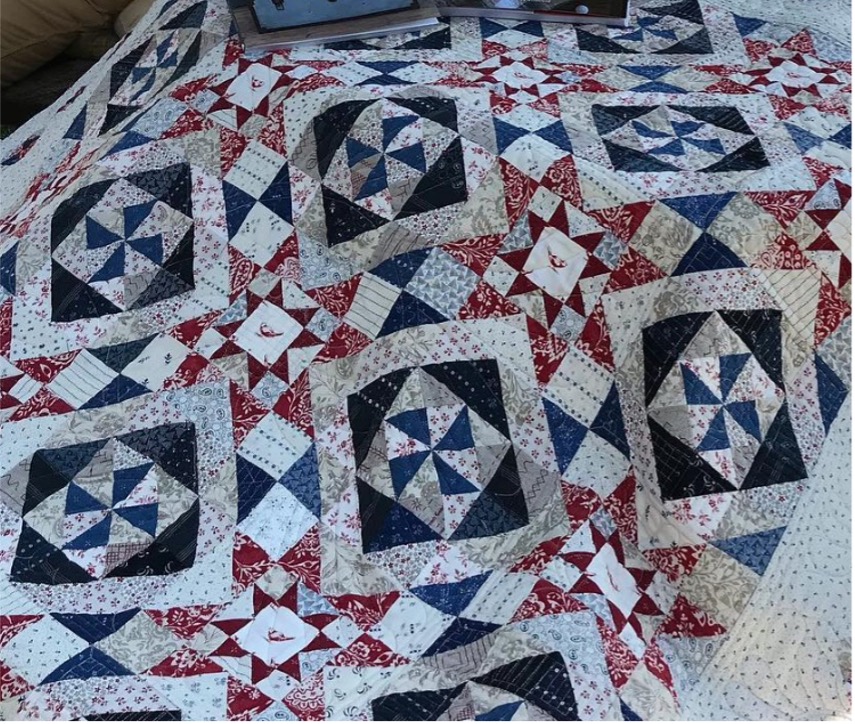
You will need one jelly roll plus 1.25m background fabric for use on the day. The jelly roll used in our original quilt had a combination of aqua, peach, red and brown which we set against a cream background. I’ve also shown Jo’s fabulous variation where she used a selection of blue and red. We’ve also seen it made in shades of blue set against a white background. Be guided by the colours you have in your chosen jelly roll or you can of course cut your own 2½in wide strips.
SUITABLE FOR CONFIDENT BEGINNER/INTERMEDIATE QUILTER
(Jo’s gorgeous variation of Twin Stars is pictured to give you inspiration for colours)
REQUIREMENTS Size: 52in x 68in
Sewing machine with full bobbin
Normal sewing kit
Rotary cutting equipment
Creative Grids 45/90 ruler (I will bring some to use in class and Jo has these to purchase in the shop)
Fabrics
1 jelly roll or forty 2½in x 42in strips
1.25m light background fabric (see
cutting details below)
1.10m border fabric (not needed on day)
50cm binding fabric (not needed on day)
Choosing your jelly roll
Our original quilt used a selection of Moda fabrics in a combination of aqua, peach, red and brown which we set against a cream background. Also pictured is Jo’s fabulous variation where she used a selection of blue and red.
We’ve also seen it made in shades of blue set against a white background.
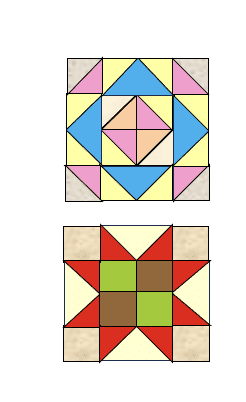
Choosing where your fabrics should go can be time consuming so before class try to allocate your placement of strips. You can see from the two blocks below where the colours go. You will probably be using different colours but count your strips and allocate where you think they should go. Don’t fret about this as we can finish this on the day.
Divide your jelly roll as follows. Artistic licence can be used here!
8 strips Colour 1 (aqua) for flying geese units
6 strips Colour 3 (pink) for half-square triangle units
6 strips light for half-square triangles
8 strips Colour 2 (red) for flying geese units
3 strips green (medium) for four-patch blocks
3 strips brown (dark) for four-patch blocks
5 strips light for corner squares
If you want to save time on the day by cutting your background fabric then here are the cutting instructions. This can be done on the day if preferred.
Background Fabric
Cut the 1.25m into seventeen 2½in x 42in strips across the width of the fabric.
Take nine of these and cut into 2½in squares.
You should get 16 per strip. You need 144 2½in squares.
Take the remaining eight and cut into 2½in x 4½in rectangles. You should get nine from each strip. You need 68 rectangles 2½in x 4½in.
Again, don’t fret about this as all can be done on the day.
I look forward to seeing you on the day and if you have any questions before class please contact me on pam_lintott@hotmail.com